Friday 21 February 2014

How To Configure Pass-Through on Citrix Web Interface

I received a request by my clients to enable pass-through to their Citrix Web Interface site. Not more than a few minutes after completion, they made a few complaints, saying that they needed to supply their credentials every time they launched published applications, which defeats the Single Sign-On (SSO) purposes. After a few minutes of troubleshooting, I realized that, in order to enable pass-through, there are more steps need to be taken, not simply enabling the feature.


Description :


Properly enabling Pass-Through, so users wot have to supply credentials every time they launched Citrix published applications, as below :


How To Do :


  1.  Uninstall current installed Citrix Receiver


  2. Once un-installation completed, open command prompt, and type CMD


  3.  Browse to the installer location, and run command ( CitrixReceiver.exe /includeSSON )to install Receiver with SSON enabled

  4. Proceed with installation


  5. When you can see this in Programs and Features, it means the installation is already completed.


  6. Go to start > run and type GPEDIT.MSC


  7.  Add new ADM template for this purpose, by choosing Add/Remove Templates...


  8. Press Add.


  9. Add the template which can be located at this path ( %SystemDrive%\Program Files (x86)\ICA Client\Configuration ). The file name is icaclient.adm


  10.  Template added. Press Close
  11.  Browse to this path ( Local Computer Policy > Computer Configuration > Administrative Templates > Classic Administrative Templates (ADM) > Citrix Components > Citrix Receiver > User authentication ) 


  12. Right click at setting ( Local user and password ), and choose Edit


  13. Enable the setting


  14. Enable the first 2 options ( Enable pass-through authentication & Allow pass-trough authentication for all ICA connection)


  15.  This is the outcome, press Apply and OK


  16.  Reboot the machine (or use GPUPDATE /FORCE) , once up access your CWI.


p/s : if it happened that users still unable to utilizing SSO, please refer to here in order to use Citrix Receiver Clean Up Utility.

Share:

Wednesday 19 February 2014

How To Put Citrix Servers Out Of Citrix Load

So a couple weeks ago I had been asked by my colleague to put some of my servers out of load for maintenance. Then I was like,  "okay, just disable logon then!". Then, he made some weird face to me while saying "Fool, if you disable logon, how am I suppose to login, then? I don't want to trouble myself with console... go figure it out!".. aaaaaannd yes, I figured it out (or was I?? :D)


Description :
Put Citrix servers out of Citrix load (some sort of private mode / maintenance mode).


How To Do :

  1. From the Citrix server (or from your local machine of you has it installed), launch XenApp Advanced Configuration Console.

  2. Right click at Load Evaluator, and click at New Load Evaluator.

  3.  You will see this screen. Put a name of your Load Evaluator (ie. Out of Loads), and at the Available Rules section, click at Scheduling.

  4.  Add Scheduling Rule (you will see it moved from left section to right.

  5.  Now, at every single day, press Remove Interval.

  6.  This is the outcomes. Press OK.

  7. Now you will see another Load Evaluator created.

  8. From Citrix Delivery Console, right click at desired server, go to All Tasks > and choose Assign load evaluator.

  9. Change current Load Evaluator to the newly created Load Evaluator.

  10.  Press OK.

  11.  Now, whenever users want to access applications resides in that server, users will see this. Therefore, it is best to configured other servers to host the applications, so it won't interrupt users' experiences.


Share:

Add a Member Server To Domain Failed Due to DNS Configuration

This would be my first post regarding Server 2012 (pretty cool, huh?) So this is the case. I just created a lab environment for my XenDesktop 7. Because of this new classy environment, so I decided to use Server 2012. I have a server act as a DHCP, DNS and DC (have to, not enough resources), and another server as member server. So when I wanted to add this member server to my domain, I received error as in Issue section.


Issues :


  • Facing with this error while adding member server to domain.
    The following error occurred attempting to join the domain <domainName> :
    The specified domain either does not exist or could not be contacted.


Troubleshooting 
  • It turned out that my DNS server is not properly configured. It is not configured to any server, thus resulting member server cannot contact to any DNS server.


Resolution :
  1. Configure the correct DNS server. Depending on your environment, you may want to set it manually at servers, or at Scope option level.
  2.  Perform IPCONFIG /Release and IPCONFIG /Renew, so new configuration will take place. 
  3.  Rejoin the member server to domain, and tadaa!


Reference 

  • http://social.technet.microsoft.com/Forums/windowsserver/en-US/8df10ef3-5789-46cc-9446-40664e56522a/error-message-the-specified-domain-either-does-not-exist-or-could-not-be-contacted?forum=winservergen
Share:

Friday 14 February 2014

CHFARM Failed on Windows Server 2008

I got this issue when I want to perform change farm on one of my Citrix XenApp farms. The installed version is Citrix XenApp 5 for Server 2008. I have not encountered any issue before while using Windows Server 2003, so I believe this issue is somehow related to the differences between those 2 Windows versions, well, particularly the UAC. 


Issues :


  • CHFARM utility failed in the middle, with below error :


Troubleshooting 

  • It is due to UAC permission, it blocks CHFARM utility from properly running because it ran in Admin Approval Mode.


Resolution :


  1. Go to Start > run, and type secpol.msc


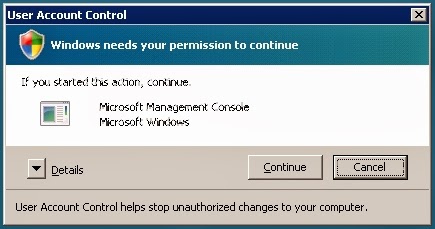
  2.  When you see this UAC permission control screen, choose I want to complete this action option, and press Ctrl + Alt + End as requested after that.


  3.  Press Continue 

  4.  Browse to Security Options as below

  5.  Search for this option :
    User Account Control : Rul all administrators in Admin Approval Mode

  6.  Right click at the option, and choose Properties
  7. At here, choose Disabled,press Apply and OK

  8. Below screen will explain why on this setting. Once everything is good, press Apply and OK.
Share: